
Since the fifteenth century, paper quilling, also known as paper filigree, has been a popular papercraft. Over the past few years, however, its popularity has rebirthed.
Paper quilling can be used for wall art, jewelry, monograms, scrapbooking, cardmaking, and even creating paper flowers. It’s amazing what intricate forms and patterns can be created with glue and basic paper strips! While paper quilling is a simple learning activity, novices may find the following pointers and advice useful.
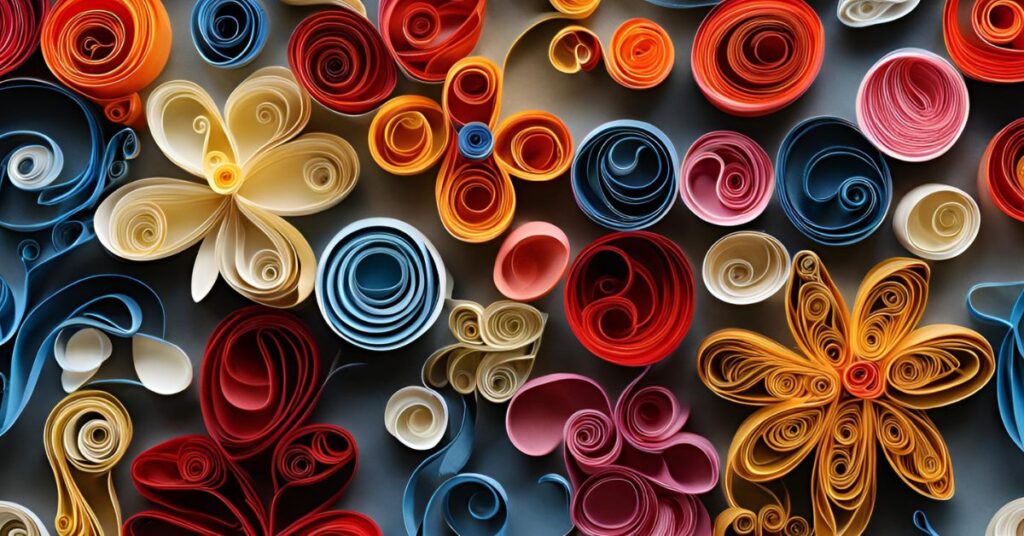
What is Quilling?
In the art form of quilling, paper strips are rolled, shaped, and adhered together to produce beautiful designs. The paper shape is worked to produce designs on its own or to adorn other items, like jewelry, photographs, boxes, and greeting cards.
The History of Paper Quilling

Paper coil art, sometimes called paper filigree, is a craft with roots in the Renaissance. European aristocrats and nuns originally used quilled paper shapes to adorn holy artifacts and furnishings. Nuns were thought to be the first to practice quilling; they would take strips from the gilt edges of books to make elegant but plain designs.
Paper quill gained popularity as a recreational activity among gentlewomen in the eighteenth century. They created ornamental panels that frequently mimicked the era’s ironwork. These works of art would later be used to decorate picture frames, coats of arms, and tea caddies, exhibiting their wealth and talent.
The skill of quilling migrated from Europe to the Americas. Quilled paper goods were typical in wealthy homes during the Colonial era when women would get together to practice quilling. As mass-produced decorative goods became more prevalent in the post-industrial era, this art form experienced a fall.
Paper coil art has enjoyed a renaissance in recent years. Modern equipment, materials, and techniques have become popular among those looking to create unique ornamental pieces or find it a calming pastime. The popularity of quilling has increased due to our appreciation of handicrafts, and this has led to a new wave of paper quillers who carry on the tradition and improve it.
Essential Tools for Paper Quilling
Having the proper equipment for paper quilling can increase your work’s quality and crafting experience. Here, we list the essential tools that every quill artist needs.
Slotted Quilling Tool: This is the quintessential tool for beginners. The small slot at the tip makes it straightforward to curl the paper strips.
Needle Tool: For more advanced quillers, a needle tool offers increased control, allowing for tight coils and intricate paper manipulation.
Quilling Paper: In various colors and sizes, these pre-cut strips are the basis for your quilling endeavors. We recommend using a range of widths for your projects, from 1.5mm to 10mm.
Tweezers: Precision is key in quilling. Tweezers enable you to easily handle and place delicate coils without disturbing other design elements.
Curling Coach: This accessory aids beginners in achieving even curls and coils—insert the tool into the quilling tool to maintain consistent tension.
Circle Sizer Ruler: This helps gauge the size of your coils, ensuring uniformity across your work when needed.
Glue: A fine-tip applicator is ideal for precisely applying small amounts of glue, avoiding mess and wasted adhesive.
Here’s a concise list of other accessories that can be advantageous:
- Scissors: For crisp, clean cuts.
- Quilling board: To pin and shape your designs.
- Quilling comb: For creating different textured effects.
- Crimper tool: To add texture to the paper strips.
These supplies are a must-have for any beginner or expert paper quill artist. They allow you to create beautiful ornamental pieces from basic paper strips.
Notable Paper Quilling Artists
- Yulia Brodskaya
Yulia Brodskaya is well-known for her creative quilling style, blends typography with paper quilling. She has collaborated with several global corporations.
- Senaida Gonzalez
She is well-known for her intricate quilled portraits and extraordinary skill in capturing facial features on paper strips.
- Manuela Koosch
Manuela has contributed to the art form through workshops and exhibitions and is appreciated for her contemporary quilled designs.
- Philippa Reid
a British artist renowned for her elaborate quilled works that combine modern and traditional motifs.
Step-by-Step Instructions
- Lay out your supplies and decide how your creation will look. Preparing the paper strips for the project using paper sheets, a craft knife, and a ruler is unnecessary; if not, use pre-cut strips, especially for quilling.
- Lay out the paper that will serve as your creation’s canvas. You have two options: either print or sketch the design (or just a portion of it, like the outline) onto the piece of paper, or leave the entire thing blank and create your design freehand.
- If you are beginning with the border of your design, take your first strip of paper and split the fibers with your awl tool to make the paper more pliable. Run the awl tool along the paper strip like you curl a ribbon with scissors.
- If you are beginning with a section of the design that needs to be shaped or curled tightly, break up the fibers with your fingers or a slotted needle tool. Then, curl or bend your strip to the desired shape, cutting it to the proper length after adjusting it by hand to suit your desired looseness or tightness.
- A small amount of glue should be applied to one of the paper strip edges. Ensure the glue is uniformly dispersed along the edge you’re trying to glue down. You can use a needle-tip glue bottle or your slotted needle tool to apply the glue to the strip or dab the strip into the glue.
- To hold your strip in place while it dries, arrange it on a sheet of paper that will serve as the base of the pattern. If you are working on the border or another large area, individually glue portions of the pattern.
- When necessary, go back to steps three through seven to finish your design.
- Once your quilling project is fully dry, you may complete it by framing it. A shadow box makes an excellent frame for quilling crafts.
Tips and Tricks
- Choose the right paper: Hannah suggests getting acid-free paper with just the appropriate weight to curl nicely without being too fragile. You can also experiment with different types of paper to find what you want; some will wrinkle more while the glue dries, while others will leak color more.
- Less glue is more: While adding too much glue can result in a mess and prolong the drying period, staking a little trip edge on the project’s canvas doesn’t take much. You can carefully brush off any extra glue from your strip using your needle tool if there is too much of it.
- Please start with the outline: For many quilling projects, it is helpful to begin with the border, especially when the design is contained neatly within the border.
Paper Quilling Closing Thoughts
These are just a few pointers to get you started on the path of paper curling art. Remember that it will take some time to become an expert in the field, so practice and have patience with yourself. If you stick with it, you’ll discover that your advancement will astound you. Before long, you’ll create exquisite quilling artwork that you and everyone you gift a paper twilling project will cherish.